Telephone Activation – Microsoft Windows

If you have purchased a Microsoft Windows product that requires telephone activation, we would like to provide you with instructions on how to proceed.

  1. Press the [Microsoft Windows] + [R] key combination (alternatively, click on the Start symbol, type CMD, and press Enter) and enter the command “slui 4” in the Run dialog.

2. A new window will open. Select the appropriate country from the drop-down menu and click on “Next”.

  1. An installation ID with nine number blocks will appear. Above it, you will find a phone number that you must call.

  1. If you prefer to perform the telephone activation yourself, a computerized voice will instruct you to enter the number blocks using the keypad on your phone. You will then receive a confirmation ID with blocks A to H. Note down this number on a piece of paper.
  2. Click on the “Enter Confirmation ID” button and enter the ID you just received.

  1. Complete the activation process by clicking the “Activate Microsoft Windows” button.
  2. Done. We wish you a great experience with your product.

Activate Microsoft Windows 10/11 via Command Prompt (CMD)

To activate your Microsoft Windows 10 or Microsoft Windows 11 via the command prompt, please open the command prompt as an administrator.

Click on Start, type CMD, right-click on “Command Prompt,” and select “Run as administrator.” Enter the following commands in the command prompt, replacing XXXXX with your product code: slmgr /ipk XXXXX and to activate: slmgr /ato

Microsoft Windows 10 / Activation Error: 0xc004f050

To resolve this issue, follow these simple steps:

If you receive the error code 0xC004f050:

Follow the instructions in the following video: [https://www.youtube.com/watch?v=hdzt59AaWjk]

  1. Enter the generic key: VK7JG-NPHTM-C97JM-9MPGT-3V66T.
  2. Turn off the internet and start the upgrade. Restart your PC.
  3. After a successful installation, change to our key sent via email and restart your PC.

Microsoft Windows 10/11 Upgrade [Home to Professional]

Error code: 0x803fa067

This error often occurs when trying to upgrade from Microsoft Windows 10 Home to Professional or when your Home version is already activated/linked with a digital license.

Option 1: Upgrade via Console

Please start the command prompt with administrative rights and enter the following command:

DISM /Online /Get-TargetEditions

with

DISM /Online /Get-CurrentEdition

To upgrade, for example, from Home to Pro, use the following command:

changepk.exe /productkey VK7JG-NPHTM-C97JM-9MPGT-3V66T

Wait for the upgrade process to complete. After successful upgrading, activate your Professional version with the purchased product key.

Option 2: Upgrade using Generic Key

If you encounter issues with an OEM key, Microsoft has provided a generic product key that can be used for the upgrade:

VK7JG-NPHTM-C97JM-9MPGT-3V66T

If Microsoft Windows shows an error, such as error code 0x803fa067, repeat the process and temporarily disconnect from the internet, for example, by removing the LAN cable, disabling the LAN adapter, or turning off Wi-Fi. Then enter the code again.

Option 3: Offline Activation

– Disconnect your internet connection (remove the network cable or disable Wi-Fi).

– Press WIN+R and enter “SLUI” in the text field. The activation wizard should open. Enter the upgrade key and/or the Microsoft Windows 10 Pro product key sent to you by email.

– Done. Microsoft Windows 10/11 Pro should now be activated.

How to Create a Bootable USB Stick for Microsoft Windows 10 Professional

To create a bootable USB stick, you need a USB stick with at least 8 GB capacity, an ISO or DVD image, and a specific tool (Rufus). Note: All data on the stick will be erased during the process.


Follow these steps:

  1. Download the ISO or DVD image to your computer.
  2. Download the tool (Rufus) to your computer.
  3. Connect the USB stick.
  4. Start the tool (Rufus) by double-clicking on the “rufus.exe” file – the tool will detect your USB stick.
  5. Click on “SELECT” and choose the ISO file (#1 on Screenshot 1).
  6. Click on “START” to initiate the process (#2 on Screenshot 1).
  7. Confirm the warning about overwriting the USB stick.
  8. Wait until the process is complete – marked with the message “FINISHED.”
  9. Close the tool by clicking “CLOSE.”


Error Message: “The execution of the code cannot be continued because VCRUNTIME140.dll / VCRUNTIME140_1.dll …

To resolve this issue, please download the Microsoft Visual C++ Redistributable for Visual Studio 2015, 2017, and 2019. The following updates are the latest supported Visual C++ Redistributable Packages for Visual Studio 2015, 2017, and 2019. It includes a base version of Universal C Runtime, see MSDN for details.

– x86: vc_redist.x86.exe

– x64: vc_redist.x64.exe

– ARM64: vc_redist.arm64.exe

  1. Download the appropriate version for your system.
  2. Start and install the downloaded version.
  3. Restart your system.

Change, Activate, or Remove Microsoft Office Product Key via Console (CMD)

If you encounter the issue where the activation window appears every time you start Microsoft Office, you should try the following troubleshooting steps to change, remove, or activate a potentially blocked or invalid product key.

If Microsoft Office activation no longer works through the normal activation mask, you should test if a second key is already entered in the background.


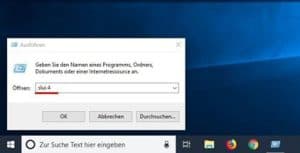
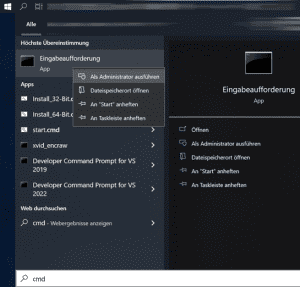
Step 1: Launch Console (CMD) as Administrator

To do this, open CMD as an administrator. Click on the Microsoft Windows Start menu button; for older Microsoft Windows versions, it is labeled “Start.” Type CMD, and with the right mouse button, select “Run as administrator.”


Step 2: Navigate to the Program Directory

cd “C:Program FilesMicrosoft OfficeMicrosoft Office16”

Note: The folder name “Microsoft Office16” may vary depending on the program version. If you have Microsoft Office installed in the 32-bit version, use the following path:

cd “C:Program Files (x86)Microsoft OfficeMicrosoft Office16”

Note: If you cannot find cscript.exe in either the “Program Files” or “Program Files (x86)” folder, try opening it from “C:Microsoft Windowssystem32”. However, the path of OSPP.VBS must be adjusted.

Example:

cscript C:Program FilesMicrosoft OfficeMicrosoft Office16OSPP.VBS /dstatus


Step 3: Display Installed Keys

With the following command, you can display the current status of installed keys:

cscript OSPP.VBS /dstatus

The output of the command provides information such as:

– How many keys are installed

– For which version of Microsoft Office the key is intended

– License status

– Last 5 characters of the installed key (used for selection)

If you find two active keys in this window, you should remove the inactive key.


Step 4: Remove Keys

To remove an inactive key, use the following command:

Replace “XXXXX” with the last 5 characters of the key to be used (output in the “dstatus” command under “Last 5 characters of installed product key”).

cscript OSPP.VBS /unpkey:XXXXX


Step 5: Enter a New Key

To enter a new key, use the following command:

Replace “XXX…” with the new key.

cscript OSPP.VBS /inpkey:XXXXX-XXXXX-XXXXX-XXXXX-XXXXX


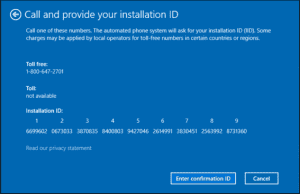
Step 6: Activate the New Product Key

To perform activation, use the following command:

cscript OSPP.VBS /act

This procedure works for all current Microsoft Office versions up to version 2021 (Microsoft Office 2003, 2007, 2010, 2013, 2016, 2019, 2021).